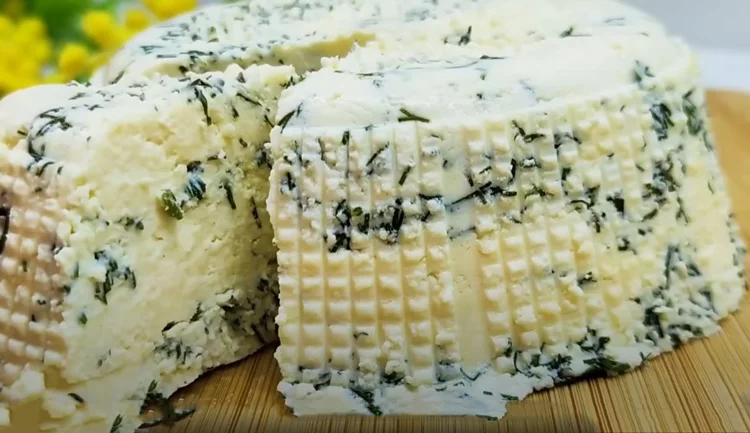
Who knew that a simple combination of milk and carrots could transform into a delightful homemade cheese? This recipe promises a budget-friendly and easy method to create a unique spread. But is it too good to be true? Let’s dive into the world of carrot cheese, exploring its secrets and unraveling the steps to make your own.
Beyond the Recipe
This recipe is a springboard for your cheesy creativity. Experiment with different herbs like dill or chives; add a sprinkle of smoked paprika for a deeper flavor; or incorporate chopped olives for a briny twist. You can even use flavored yogurt instead of sour cream for a subtle infusion.
How to Make Cheese From Carrots and Milk?
Ingredients
- 1 liter of milk: Whole milk is recommended for richer flavor and better curdling, but skim or low-fat options can work too.
- 2 carrots: Fresh and vibrant carrots add a touch of sweetness and subtle earthiness to the cheese.
- 200g of sour cream: This adds tang and helps with curdling the milk. Plain yogurt can be substituted.
- 2 eggs: They act as a binding agent and contribute to the cheese’s texture.
- 1 teaspoon of salt: This enhances the flavors and balances the sweetness of the carrots.
Instruction
- Warm Up the Milk: Gently heat the milk on medium heat until it’s steaming hot but not boiling. Patience is key here, as boiling can alter the curdling process.
- While the milk warms, transform your carrots. Blend them or grate them finely, extracting all their juicy goodness. Squeeze out the excess pulp, leaving behind the vibrant orange liquid.
- Once the milk is hot, slowly whisk in the carrot juice. As you do, observe the magic! The milk will start to curdle, separating into solid curds and milky whey.
- Now comes the creamy chorus. Add the sour cream, eggs, and salt, whisking gently until everything is well combined.
- Bring the mixture back to a simmer, stirring occasionally. The curds will continue to separate, and the whey will become clearer. This stage takes about 10 minutes.
- Line a colander with cheesecloth and set it over a bowl. Carefully pour the cheese mixture into the colander, allowing the whey to drain. Gather the cheesecloth ends and twist them gently to squeeze out any remaining whey.
- Transfer the cheese curds to a mold or small bowl. Place a weight on top (a heavy plate or small pot works well) and refrigerate for at least 3-4 hours, or overnight for a firmer cheese.
- Finally, the moment you’ve been waiting for! Unmold your creation and admire its unique, slightly orange hue. Slice, spread, and savor the unexpected delight of your homemade carrot cheese.
Tips for Success
- Use fresh, high-quality ingredients for the best results.
- Don’t overcook the milk, as it can make the cheese tough.
- Be gentle when handling the curds, as they can be delicate.
- For a smoother cheese, blend the curds briefly before shaping.
- The whey you drain can be used in smoothies, soups, or for baking.
So, is carrot cheese too good to be true? Not at all! With its ease of preparation, unique flavor, and endless customization possibilities, this recipe is a delightful adventure for curious cheese lovers. So, grab your carrots, milk, and a sense of wonder, and embark on your cheesy journey!


